 Mark Johnson's
Reviews
Here are the reviews by Mark, click on the review you would like to see:
Wilhelmshavener Cessna 310
Digital Navy Macchi 202
Digital Navy P-26
Geli SAAB 35 Draken
Model Art P40
Model ART Me 109
Fiddelers Green GBZ
Robert Kaelin J3 Cub
Emil Zarkov's CH-34
Fiddlers Green SPAD
Wilhelmshaven Cessna 310
Scale 1/50, Source PMI, Purchased - Dec 1999, Built Feb 2000
Overall: This is the only Wilhelmshaven kit I have assembled. Altogether I've built only about a dozen card models( about a thousand in other media). I built two 310s, one with every available detail, the other without interior and landing gear up. This is a small scale for a relatively small airplane with lots of detail and many small parts. For example, the wing tip fuel tanks are each composed of 7 cylinders and 19 separate parts. The nose gear alone also has 19 parts. The model includes a complete interior with options for clear or solid windows. I'm still struggling to find the right glue for attaching acetate to paper for cockpit windows. With the glues I've tried, as soon as you try to bend the frame the plastic comes loose from the paper. The result on this model was ok but far from perfect. All this detail makes construction slow and at times difficult, but the results are worth the effort.
Instructions: The model came with English and German instructions that were clear, correct and easy to follow. The plan also has many small detail drawings of the assemblies that proved invaluable.
Construction: The 310 has many complex curves and Wilhelmshaven handled these with the bulkhead and cylinder approach. Because there is so much curvature in the airplane, there are lots of cylinders. I think it's a combination of this design, the color of the model, and my building inexperience, but all these cylinders give an unusually choppy look to some areas of the airplane. This is especially true in the nose and on the fuel tanks. The fit of the parts however was outstanding. This was every bit as good as a Model Art kit; which, by the way, I consider to be the standard by which fit should be judged.
Color: The ink, paper and printing are all good although compared to current technology products, the kit looks somewhat dated. The actual colors on the model are an interesting 1950s style multi color pattern that probably duplicates some actual prototype. Given a choice they are not colors I would have chosen since I don't remember seeing anything like it on a full size airplane. It would be great to see this model with the Sky King markings (Although I think that was technically a slightly different 310 variant).
Completed Model: I have had experience with the actual airplane represented by this model and believe the overall impression of the completed model is very good. The Fully detailed model looks the best of the two. You can't see much of all that interior detail but there is satisfaction just knowing it's there. The distinctive 310 landing gear, especially the nose gear, is also well duplicated. Overall this was a very satisfying project that took about a week of evenings per airplane. I would highly recommend it to anyone looking for a classic civilian airplane from the 1950s.
Return to the top of the page
Digital Navy Macchi 202c
Scale 1/32, Source Digital Navy Web Site, Purchased - Dec 1999, Built Jan 2000
Overall: Seeing the pictures of this obscure but very unique airplane on the Digital Navy web site, I had to build one. I sent Roman Detyna a modest check and he promptly returned two floppy disks containing several .pdf files. When printed, these produced five pages of parts and two pages of diagrams/ instructions. This includes parts for two versions of the airplane, one in a light colored desert scheme, the other in a darker green. I built the desert version. This was only the second card model I had built at the time and although it was quite detailed, I found it to be straight forward to build. The total building time took about one week, with two hours per evening. The model includes complete interior and wheel well detail. All parts fit perfectly on the first try and the finished product is nearly as nice as the one on display on the web site.
Construction The kit uses the typical cylinder/bulkhead fuselage technique. The center section of the fuselage includes a main spar arrangement with one rib per wing that effectively aligns, reinforces and shapes these joints. One of the great features of the prototype aircraft is all the unusual bumps and shapes on the outside of the airframe. All of these are well duplicated and result in a very interesting model. Two problem areas were noted. First was the shape of the fairing behind the cockpit. This is supposed to have a distinctive concave shape on the sides but the instructions didn't show this very well and mine came out in a normal smooth convex curve. The second difficult area is my normal problem with attaching acetate to paper. As soon as I try to shape the canopy assembly the plastic separates form the paper. After several attempts I got an acceptable result, but there must be a better way, especially since this is a relatively simple canopy..
Color: : Being a digital kit, the colr quality will depend to a great extent on your choices for paper and printer. I printed mine on plain 80lb card stock on an old Cannon 210 inkjet. This gave fair results but the colors were somewhat faded. I have since upgraded my printer to an HP DeskJet 720(less than 100$) and the results are now beautiful when printed at 300 dpi. The 80Lb stock proved to be a good choice for handling and the dull finish looks realistic on a WWII fighter.
Completed Model: I was very satisfied overall. In fact, I used this model as a test case to see if I really liked the card media, and now I'm hooked! The model compares well with plastic alternatives but with an easier to achieve finish, reduced build time, lower cost, less exposure to toxic chemicals, and that amazement factor that comes with an object created from just a few flat sheets of paper! Highly Recommended
Return to the top of the page
Digital Navy P-26
Scale 1/32, Source PMI, Purchased - Jan 2000, Built Jan 2000
Overall: PMI offers three version of this kit, I built the two US versions. They both went together very well each consuming about a week of spare time. They contain a detailed interior and the kit includes wire for the rigging.
Construction: Fuselage built up of Cylinders with a two piece wing structure. The center fuselage formers include partial spars and ribs that locate, reinforce and shape the wings. The model includes a detailed interior. Fit of all parts was excellent.
Color: The printed sheets produced by PMI are on a flat finish medium weight card stock. The colors and definition are excellent as you would expect from a computer generated, laser printed design. I wish these kits were also offered digitally like the Macchi c202 also designed by Digital Navy
Completed Model: The completed models are real works of art with their prewar color schemes, open cockpits and gleaming wire rigging. The only area where would like to see more detail is the engine, which is a bit basic, but the overall effect is still good. These models were a joy to build and I highly recommend them.
Return to the top of the page
Geli Saab Draken
Scale 1/33, Source PMI, Purchased - Dec 1999, Built March 2000
Overall: I was attracted to this kit because I like unusual airplanes and Saab always builds unique aircraft. The quality of the model is a bit dated compared to the more modern designs I have tried, but it still looks good if you don't examine it too close. I don't know about the accuracy of the shape, but to me it pretty well captures the essence of the prototype
Construction: The fuselage is built up of MANY cylinders. This is a long structure. It's fun just to watch it grow. There is some problem with alignment of the markings along the fuselage but the overall fit was not too bad. The material used was bit too think and if a bulkhead is not trimmed to a slightly loose fit, it can cause a bulge in that section. The Delta wings were somewhat complicated but the English directions guided you fairly well through the process. .The model includes a poorly detailed interior which I replaced with a copy from one of my other kits.
Color: As most of you may know, Geli produces a glossy natural aluminum finish which is well suited to jet fighter subjects like this. Unfortunately the makings are inconstantly registered and most other colors are rather strange.
Completed Model: The completed model looks impressive on first look. You have to get fairly close to see its flaws and because of its large size you don't have to get that close. The biggest pluses on this kit are it's low cost( about $6) and the fact that you can't find this airplane in any other form. If the airplane interest you, you might give this one a try.
Return to the top of the page
Model Art P40
Scale 1/72, Source Paper Paradise Download, Purchased - Jan 2000, Built March 2000
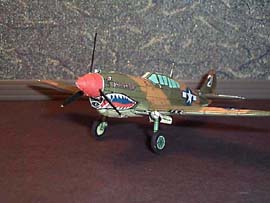
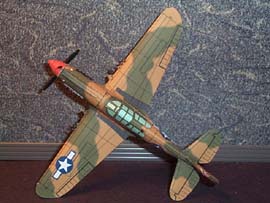
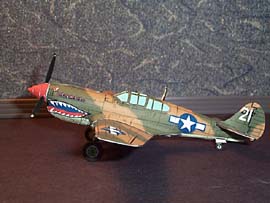
Overall: This was the first of Emil Zarkov's designs I built (although his F-15E was the first I purchased) and I was very impressed! I have built allot of plastic and I can seriously say that this model's visual effect is as good or better then any of those. I liked it so much that I've since purchased every kit in the series and anxiously await new additions. At first I was afraid the 1/72 scale would prove difficult to manage. In fact, each exhaust manifold consists of 7 tiny parts in an subassembly that's only ¼ inch long! In the end however, with average care and a good pair of tweezers, the small size was not a problem. Another unique feature of these models is that the can be downloaded from the web for nearly instant gratification. This does however require that you have a computer and printer available.
Construction: The Fuselage is built up of only a few cylinders that are butt joined together and shaped and supported by bulkheads. Some of the small assemblies (like the distinctive bumps on the leading edge of the wing that fair the landing gear housings) look impossible but miraculously all seem to come out perfect. The wing has a full span spar with built in dihedral and one rib per side. This proved to be perfect for obtaining the desired shape and angles. The model has no interior. One fussy part is the wing root fairing. After a bit of preshaping some curves into it, I attached the back half of the part. This gave me better leverage for finessing the front half. One note on tools., I found a set of assorted diameter 12" dowels in the craft department at Wal-Mart. In the same section was an ~1/8" thick 12x12" sheet of semi firm foam. I place the part on the foam and roll the dowels over it to get the desired curvature.
Color: As with any digitally delivered model this will depend on the printer and paper you use. Mine came out very nice on 80 LB card stock with an HP 722c DeskJet at 300 dpi.
Completed Model: The completed model is as nice as any I've every built in any scale or media. For the cost ($3.95), this kit can't be beat. I have read somewhere that Paper Paradise will send you printed copies if you call them, for those without a color printer. This is a must have model.
Return to the top of the page
Model Art ME-109G
Scale 1/72, enlarged to 1/40, Source Paper Paradise Download, Purchased - Dec 1999, Built Feb 2000
Overall: All the comments about the P-40 by Model Art also apply to this model. One unique feature that adds a lot of interest is a drop type fuel tank mounted beneath the fuselage centerline. I can see possible other applications for this tank. On one of the Model Art kits it aid to look for a future kit of munitions. I have not seen this yet but hope Emil publishes it because hanging things on the wings of these little jewels makes them look great. This particular model I scanned back into my computer and enlarged to 1/40 scale. I choose 1/40th because that was the biggest scale that would fit a standard sheet of paper. Although the results were good, the enlargements were not as good of quality as the smaller originals.
Construction: Same features as the P-40.
Color: There are some good pictures of all the model art airplanes at the Paper Paradise Web Site. They come out of my printer looking exactly like the pictures. This one in particular looks good because of the yellow markings on the nose.
Completed Model: Another great MA model. I can't recommend them highly enough. Because it is very similar I won't comment on it separately, but I also built the ME-109F in Desert Camouflage and it is as good as the rest.
Return to the top of the page
Fiddlers Green GBZ
Source PMI - Jan 1999, Built Feb 2000
Overall: If you have the equipment for printing your own kits, you can't beat the Fiddlers Green(FG) CD with over 100 models on a single CD (~$50 from multiple sources) . Along with this impressive supply you get access to a year's worth of new models at no extra charge. This is how I acquired the GB I'm describing here. This airplane is the less well-known brother to the GB R-1. I actually prefer the slightly more conservative outlines of the Z type. I also like the more muted colors.
Construction: The great thing about FG models is their simplicity. You can easily assemble them in one or two evenings. I like to build one between each more complex project. Sometimes I wish for a bulkhead or two to help in defining the proper cross sections, but in the end the structureless method works fairly well. Be sure to add rigging to the GB, it's simple and adds a great deal to the finished product. The only week areas of the kit were the wheel pants and the propeller, which came out too flat. This may be my technique and you really can't find fault with a kit that retails for $1.00!
Color: Perhaps the best feature of any FG model is the beautiful artwork. The GB is a colorful subject and is well executed. You can see this model at the FG or the Paper Paradise Web Site. Completed Model: This model looks really good when mounted on the included stand, which looks like a racing pylon. It's only a buck, Try one!
Return to the top of the page
Robert Kaelin J3 Cub:
1/24 scale, Source PMI - Jan 1999, built May 2000
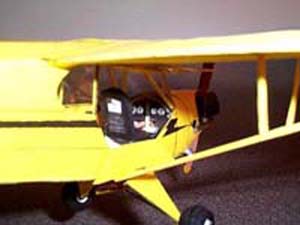
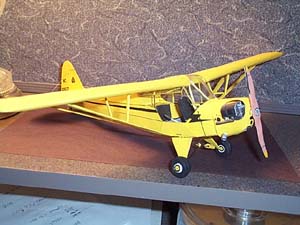
Overall: The model comes printed on 2 pages of orange/yellow card stock, 1 page of white card stock, and 1 page of orange/yellow 20 Lb. paper. It also contains a 4-page instruction book with figures, and a three-view drawing. Finally, there is a letter-sized envelope with assorted bits and pieces of wire, acetate, and reed. This is a very realistic model when carefully assembled and has a complete interior, which could be super-detailed with ease. It took me longer to assemble than any other card model I've tried so far.
Construction: The fuselage construction was a complex combination of flanges, tab/slots, and subassemblies that combine to form a fairly rugged and very realistic structure. Special care is needed at the bottom of the tail to keep the lines straight. It's also difficult to keep the assembly lines out of view on the ridgeline at top of the fuselage. I think next time I'll try to reverse the sheets and place the printed side inward. This would mean I'd have to reproduce the markings, but they are few and simple. The wings are very simple one-piece assemblies with three internal ribs each. I found the ribs did not fit very well (too short) and were not stiff enough to support the massaging that was needed to get the wings into shape. I also would have preferred to see a full span spar to help increase the rigidity of the wings and to help with alignment and dihedral. I'll consider designing a built-up balsa wing structure to use in the next one I build. And I think I will build another, it's that good. I may also try to scribe rib lines on the inside of the wing panels. That detail is a prominent feature on the full size Cub and would be a welcome addition to this replica. Be careful when attaching the wings to get the leading edges parallel, mine came out with a trace of sweep. The detailed cockpit is in full view and a major feature of this model so the windows are very important. The instructions say to reinforce the front windscreen pillars with wire. Do not skip this step as the pillars will tend to bow out under the pressure from the windscreen. The acetate I used was a little to thick for this application.
Color: The parts are unique in that the color is in the paper, not the ink. The printing is simply the outline and details of the part. This means you don't have to color the cut edges as the color goes all the way through the paper. This also lets you lightly sand where necessary while not destroying the finish. Sanding was necessary at the various joints, greatly improving their appearance. The paper used for my kit appears to be a little too orange for a cub, which should be a nice deep yellow.
Completed Model: I highly recommend this model to anyone with a little experience. . If you try to soon you're apt to loose patience and give up when something goes wrong. Experienced modelers will find it to be quite challenging but very rewarding when you get it finished. I'm already looking forward to trying it again. With the low price (5.95 at PMI) you could buy several and keep trying until you get it right!
Return to the top of the page
Emil Zarkov's CH-34 in 1/33 scale
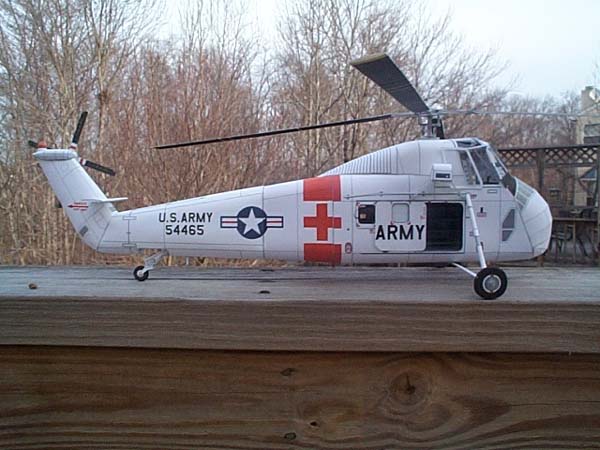
I'm working on a review for Air and Sea Models on the ModelArt CH-34. Attached is a picture of the finished model. It is suprisingly easy to build although there are a lot of parts including some
real small ones. Note-- A full building review of Marks experiences building this model will appear in a future issue of Air and Sea Models. To subscribe to the magazine see the instructions on the Home Page of this site.
Return to the top of the page
Fiddlers Green SPAD XIII in 1/4 Size
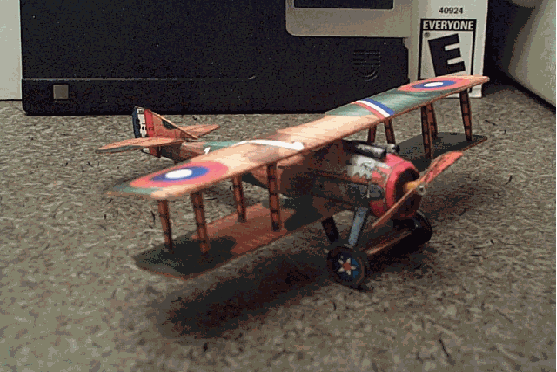
I printed this standard Fiddlers Green kit on one-quarter section of an 8.5 by 11 sheet of card stock. To do this set your printer to custom size paper and 4.5 by 5.5 inches. Check the "Autorotate" and "Shrink to Fit" functions to fool the printer into placing the image in the top left corner of the page. Using this technique you can get four models on each sheet of cardstock! Simply rotate the sheet and feed through again. Then flip it over and feed through two more times. The wingspan comes out to about 2.5 inches but I haven't figured out the scale yet.
This model was fairly easy to build in spite of the small size. Just work slowly and use sharp tools, good lighting, and tweezers. The cut edges are all cleaned up with Testors flat enamel after assembly. The wing struts are two laminations of card, painted light brown on the back and edges before assembly. To assemble the wing glue the struts to the bottom wing first, then when dry, turn over and attach the top wing one strut at a time. The propeller hub is a tiny piece of round toothpick


Return to the top of the page

This page was created by:
Saul H. Jacobs M.Ed.
Microcomputer Technology
Pima Community College
Tucson Arizona


