Photos by the author
Part 3 ended with another almost completed building. To complete the building,
it has to be attached to the next section. In the case of Section �B� it will
have to be attached to Section �C�, which is the subject of this review.
Section C is different from the first two sections because not only do we have
a small building, but also we start on the bridge to the main entrance.
You will be pleased to note that there is not too much about the building because
it follows the same techniques of the earlier buildings. Two walls have windows
and doors, the third side is an internal wall and will be attached to the next
part and the fourth side is made of tabs that attach to section B that was completed
in the 3rd part of this review. Easy isn�t it?!
O.K. - here goes for parts with a new colour, this time a slightly different
blue identifies Section C. However, all is not as it appears, as you will find
out later!

Pic 1 A new type of construction for the windows appears. They still attach
from behind, but now produce only a shallow window.

Pic 2 Here is the tower and one wall. At this point I started looking for
parts to make up the right hand wall. I spent ages looking for the parts, until....

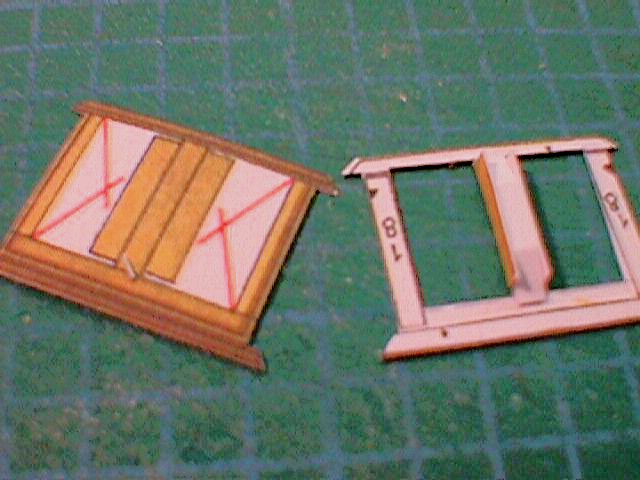
Pic 3 I discovered that one of the pages had the wrong identification letter!
As you can see, we have the right colour but the wrong letter.
Pic 4 This shows the detail on the double windows; as you can see the centre
post has three sections. The lines have to be scored to create three sides of
the post. This is needed because the windows are recessed from behind - yet
another sign of the detail that is built into this kit.

Pic 5 Yet another example of detail is shown here. The frame is double
thickness - who will ever know? Only me, and so it has to be done properly!

Pic 6 As mentioned above, there is a problem with the numbering. At this
point we enter uncharted territory. Literally, because the (generally detailed)
drawings completely ignore the inner wall! It is not too much of a problem because
once the wall was identified, it is put together in the same way as the others.
The previous part of this review mentioned my concerns about when the roofs
should be added. At this point in the build I realised that joining the roof
to the walls and tower was going to be complicated and would be more complicated
if I joined the buildings then tried to add the roof. I was able to discover
the clever way the roofs and building of each section will join (more on this
in a later issue) - therefore I added the roof at this point.

Pic 7 The phantom wall, with the roof added.

Pic 8 One of the embellishments to the building is an ornate dormer window.
The main part is made of one piece that folds back onto itself with a thin insert.
This picture shows how the insert is bent into the shape of the front. The lower
part of the piece is then folded up to the triangular tabs. I had to make a
few minor adjustments to the top strip to ensure a smooth fit.

Pic 9 I have jumped on from the building and started on the bridge. This
picture shows one side of the wall together with the sides of the arches. The
windows you�ve seen before but the wall sides add a new process. These are folded
at the top of the pillars and gently rolled to follow the contours of the top
of the arch. The coloured areas are the �ground�.

Pic 10 This is the inside of the bridge, showing how many tabs need to
be glued.

Pic 11 Here we have the more normal view! The other wall has been attached.

Pic 12 The next part of the gate is a tower. The windows are quite complicated
because the frames and �glass� are flat while the outer frame has to follow
the curve of the tower. The windows and frames are made in the same way as the
other windows, that is, they are formed into 5 sided boxes. I added the windows
to the outer frames then glued the outer frames to the tower. I put the windows
on a small box before I glued them to the walls to ensure the curve of the wall
was not interrupted.

Pic 13 Here is another inside shot. I added a template just below the windows.
This helps to keep a good curve, and also makes a good base for the extra bits
that are added to the front.

Pic 14 This is another tower that is attached to the round tower. The windows
and arches are the same as the others so I�ll let you off yet another lot of
notes on the subject!


Pics 15 & 16 I have added the ground effects. The close up of the round
tower shows up the double depth of the windows.

Pic 17 Ricardo Leite mentioned the number of parts in the roof of the tower.
Here is the proof ! It looks complicated...and it is ! But the parts fit very
well, so by taking a lot of time and concentration a very well shaped roof is
the result.


Pic 18, 19 and 20 Here are three views of the completed gate and bridge.
That completes Section C. Next time we move on to Section D and a new colour.
Judging by the diagrams, the next section could be �fun�. Tune in next time
to find out if I�m still sane. Although �sane� in my case is a relative term;
anyone who starts this kit must have a few screws loose!
